How to Install WordPress Alpha, Beta and Nightly Build.
Marc Wagner
July 11, 2021
WordPress is the most used content management system worldwide. That’s the reason why it is constantly updated. New functions are made available in a beta version for webmasters and developers.
With the beta version, WordPress enables developers to check their themes and plugins for compatibility and, if necessary, to provide an update.
How do you install the beta version of WordPress? #
The beta version can be downloaded as a plugin via the WordPress Plugin Manager. So it is very easy and does not require any programming knowledge.
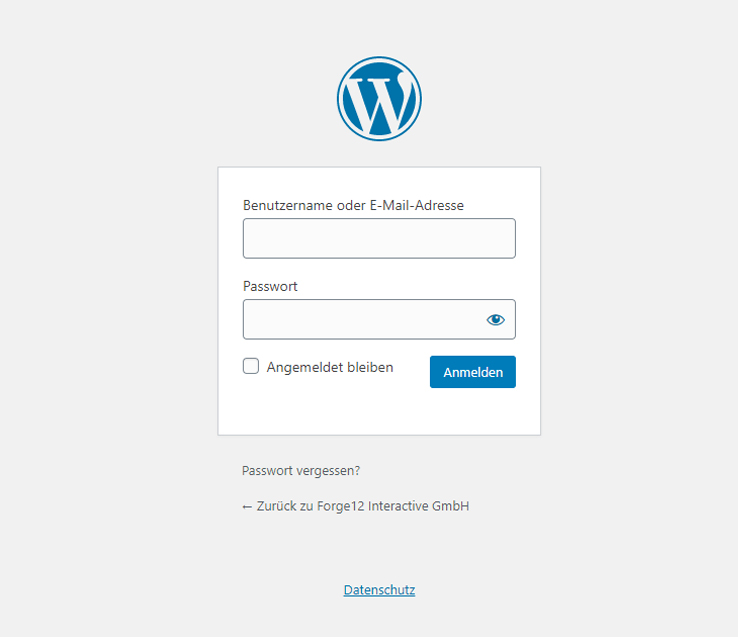
Step 1: Log into the WordPress dashboard of your website.
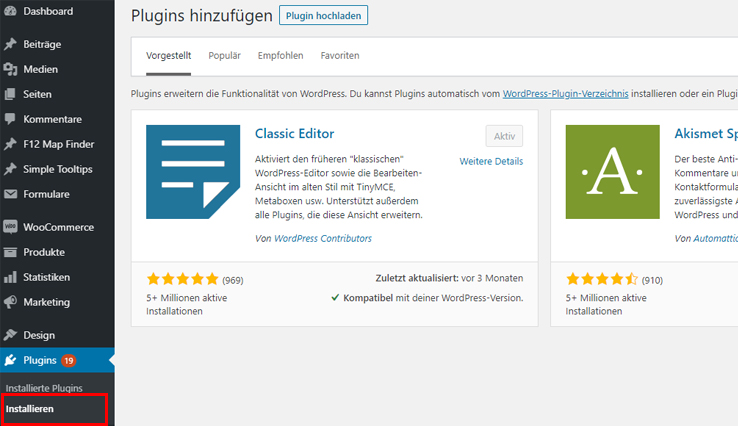
Step 2: Switch to Plugins > Install.
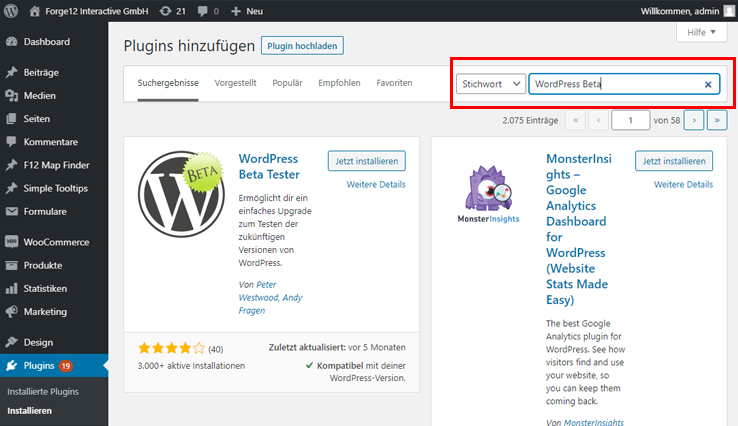
Step 3: Search for: WordPress Beta.
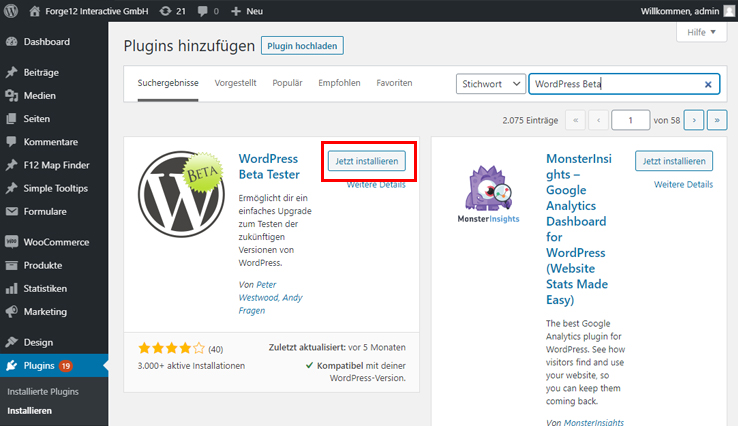
Step 4: Click on: Install now.
Step 5: Click on: Activate.
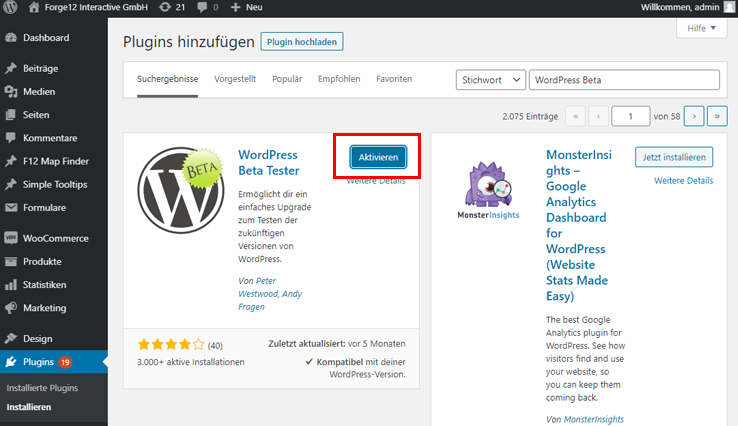
The WordPress beta tester plugin is now installed and activated. In the next step, we will learn how to configure the plugin.
How to configure the WordPress Beta Tester plugin. #
Via the Settings Tools> Beta Testing you can specify which updates you would like to receive. You can differentiate between larger and smaller versions.
Smaller versions (minor version updates) usually run stable, since no bigger new functions are added here and no obsolete functions are removed.
Major version updates, on the other hand, are the larger jumps in which something changes in the core of WordPress or new and bigger functions are added.
The following steps will help you define the settings of your choice:
Step 1: Switch to: Tools > Beta Testing.
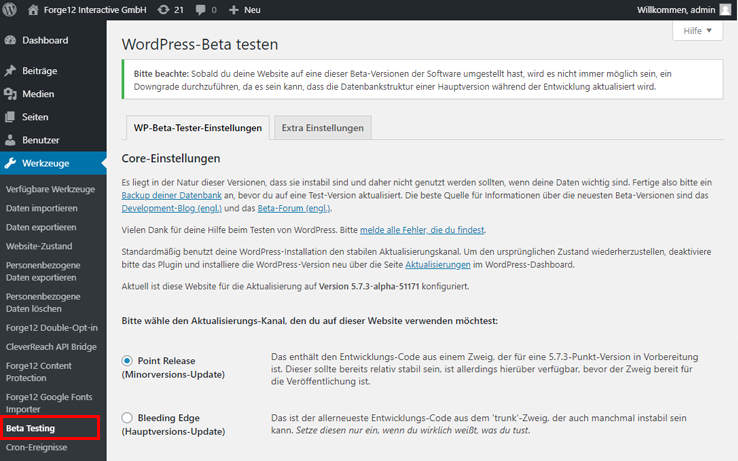
Step 2: Select your preferred update build.
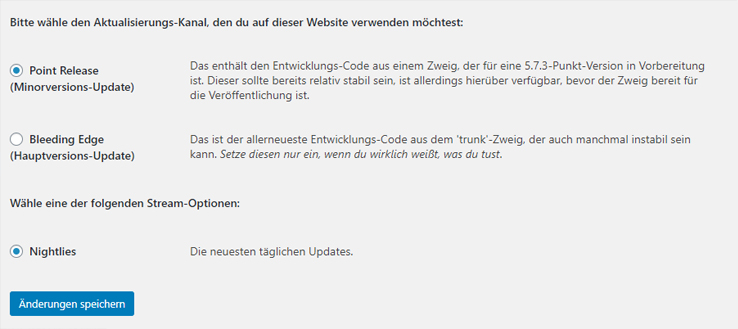
- Point Release Updates
Recommended for more stable updates. There may still be errors here, but most of them should be fixed so that the chance of your WordPress website becoming unstable is minimal. - Bleeding edge Updates
Recommended for developers only. Updates can contain errors that affect your WordPress website / WooCommerce shop or WordPress application.
Step 3: Click on: Save changes.
Once you have chosen your desired settings, all you have to do is save your settings.
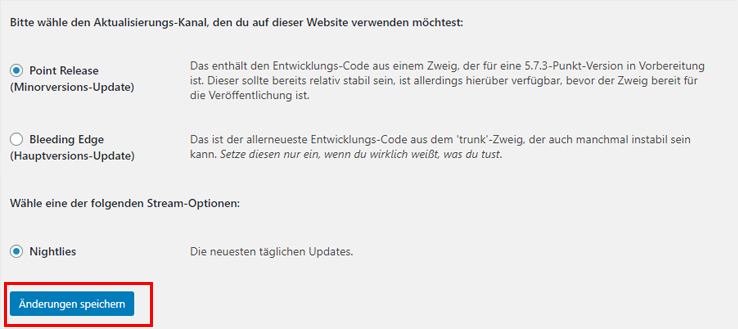
Let’s go to the final step. Update your WordPress version to the selected build.
How to update WordPress #
Follow these steps to update your WordPress version to the selected beta build.
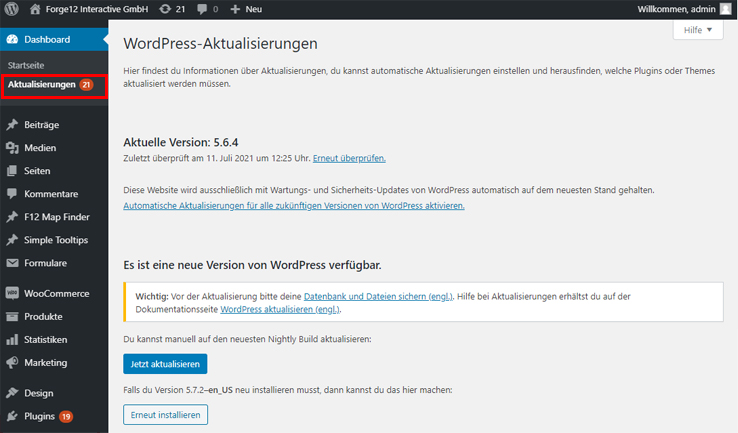
Step 1: Switch to Dashboard > Updates.
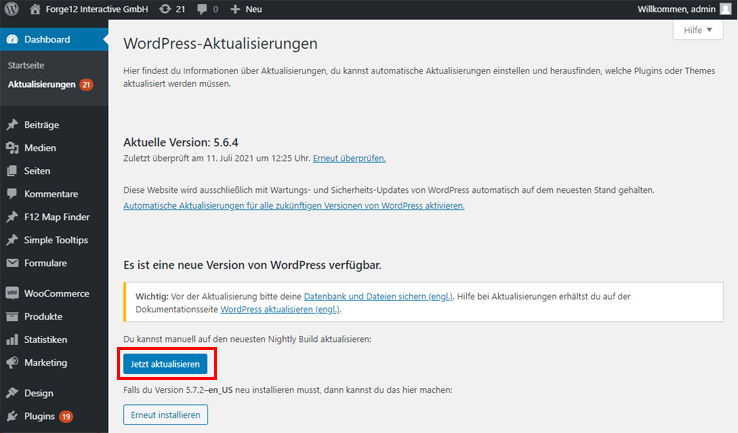
Step 2: Click on: Update now.
That’s it. After the installation, you should be on the defined WordPress beta build.
Do you need help preparing your website or online shop for the latest WordPress version? Then do not hesitate to contact us. As a WordPress agency we are specialized on WordPress, WooCommerce and Web development.
Summary #
The installation and update to the latest WordPress beta version is quick and easy. With only a few clicks, you can choose between major and minor updates.
Despite everything, you should never use the beta version for live operation. It may contain errors, and there may be incompatibilities between the plugins, the theme and the WordPress beta version.
But if you already want to test the new WordPress functions on a staging or development environment, this is the way how to do it.
I hope you enjoyed the little tutorial about how to install the WordPress beta build. If you have any questions, please feel free to leave a comment.
Artikel von:
Marc Wagner
Hi Marc here. I’m the founder of Forge12 Interactive and have been passionate about building websites, online stores, applications and SaaS solutions for businesses for over 20 years. Before founding the company, I already worked in publicly listed companies and acquired all kinds of knowledge. Now I want to pass this knowledge on to my customers.

