Embed Google Fonts easily in WordPress (2022)
Marc Wagner
February 4, 2022
To keep your WordPress website compliant with the GDPR, you should embed your Google Fonts locally. The whole thing is not difficult at all and can be implemented smoothly with a few CSS specifications and the WordPress plugin Asset CleanUp.
At the latest with the ruling of the LG Munich from 20.01.2022 you should become active here and embed the fonts locally.
Step 1: Which Google Fonts are loaded on your WordPress site? #
First, you need to check which fonts are used on your website. For this you can use the developer tools of Google Chrome (Safari, Opera and Firefox also have developer tools).
Now first open your web page on which you want to check whether Google Fonts have been included.

Then switch to the developer tools (F12 on the keyboard, alternatively you can click on the 3 dots in the upper right corner of your browser and open the console in the menu > More Tools > Developer Tools).

You should now be able to see a new window with the developer tools (DevTools).

In the new window, select the Network > Fonts tab to display all the fonts loaded from the web page. Then reload the page (F5).

Now you get an image of all fonts that have been loaded. You can use the filter to narrow it down by searching the results for the keyword “gstatic” (Google fonts are usually included via fonts.gstatic.com).
On our example page, only the font “karla” from fonts.gstatic.com is included. It’s best to make a note of all the fonts you see. The next step is all about finding and downloading the fonts.
Step 2: Download Google Fonts #
Now that you have found out which fonts are used in the first step, you must of course download them first.
Fonts are offered in various formats TTF, WOFF, WOFF2, EOT and SVG. This is because not all devices support all formats. Therefore, to ensure the best compatibility for your WordPress website, you should always make sure to include all formats if possible.

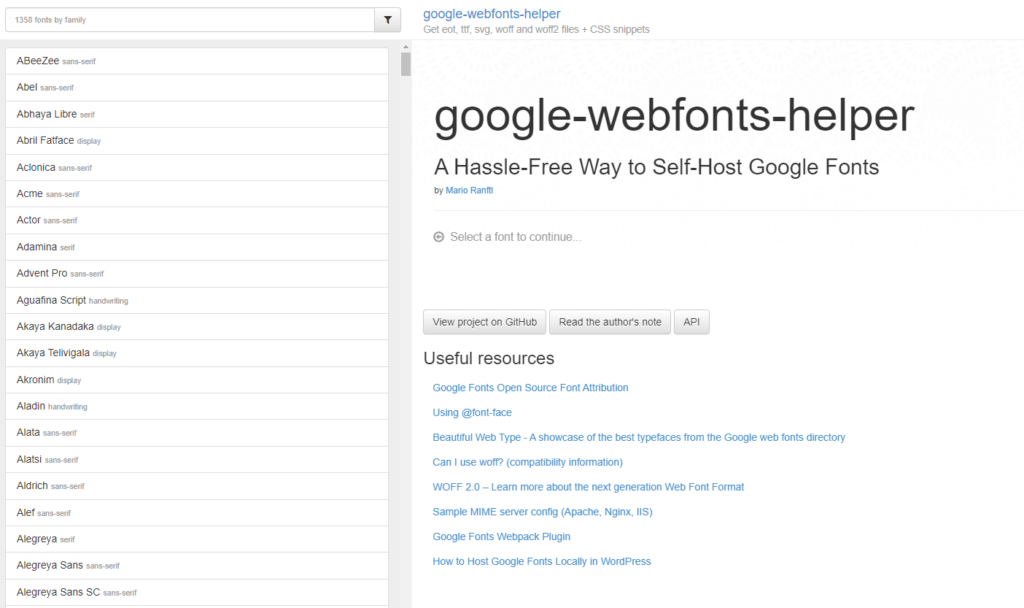
Google itself only offers the TTF format for download. Therefore, the Google Web Fonts Helper website provides a remedy.

There you can find all Google Fonts for download in different formats. By searching in the upper left area you have the possibility to filter the list. Now enter the name of the fonts you found in step 1.
Then select the appropriate font with one click.

You will now see the detail view on the Google Webfonts Helper page with more options. Here you can choose the charset and the desired styles. The page also generates the CSS styles and allows you to download the fonts.

To continue, select the styles you want now and then download the files by clicking the button at the bottom of the page.

We will need the CSS in step 3 later, once we add the data to your website. It is helpful to leave the page open so that you can easily customize the folder later (field: Customize folder prefix) and the CSS will be regenerated automatically.

Step 3: Deploy the Google Fonts to your web server #
Next, you need to upload the downloaded fonts to your web server. For this you ideally use a FTP program (e.g. FileZilla, WS FTP or similar).
So connect to your server and change to the theme directory of your WordPress website. Here you create a new folder, which you call “fonts”.

Then you switch to the folder and create a separate folder for each of your fonts. Then you copy the fonts that you have previously downloaded into it.

Now copy the path to the font. In our example, it is as follows:
/wp-content/themes/storebiz/fonts/karla/You can now add this to the Google Web fonts Helper in the “Customize folder prefix” field to generate the CSS. (Note: Be sure to include the “/” at the end of the path).

Step 4: Include CSS to use the Google Fonts locally #
In order to load the Google fonts that we uploaded via FTP before, you have to tell your WordPress website via CSS where to find them. You can do this for example via the style.css of your theme. Alternatively, you can also add it in the WordPress Customizer.
To do this, open the style.css file located in the root directory of your theme (child theme). Copy the CSS code to the end of the file. Save the file and upload it again to your server.

That’s it — now we just need to disable the calls to Google Fonts on the CDN.
Step 5: Disable loading of Google Fonts via CDN #
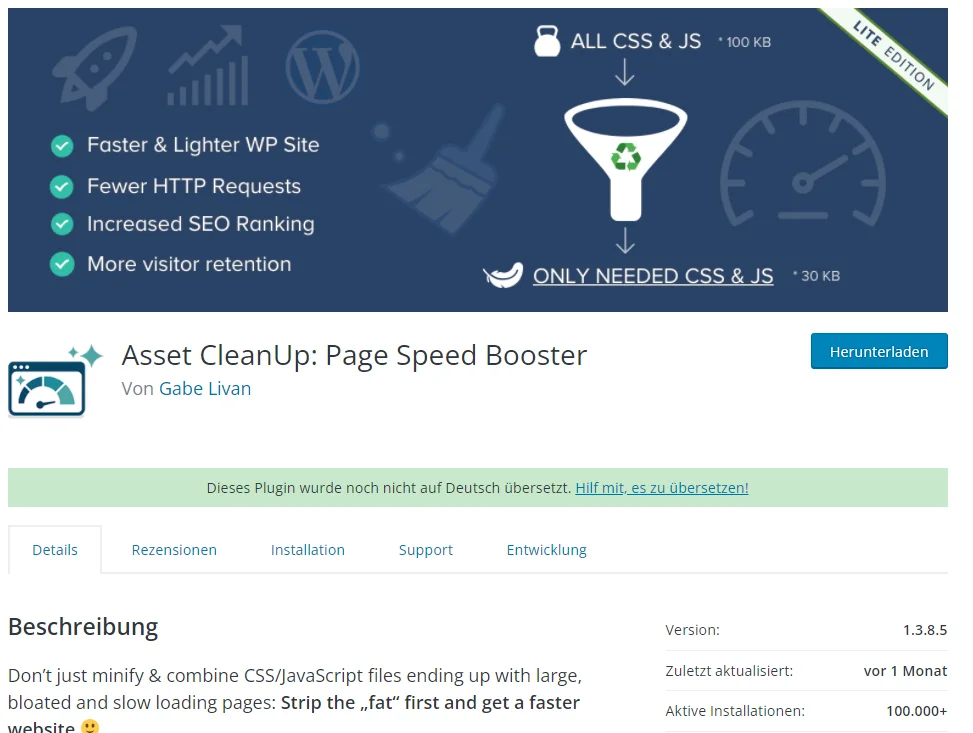
Google Fonts can be integrated into your page in various ways. The best experience we have had so far to disable the fonts is with the WordPress plugin Asset CleanUp. The plugin has so far detected and removed all links on our test pages.

The free version of the Asset CleanUp plugin can be downloaded and installed directly from the WordPress Plugin Manager.
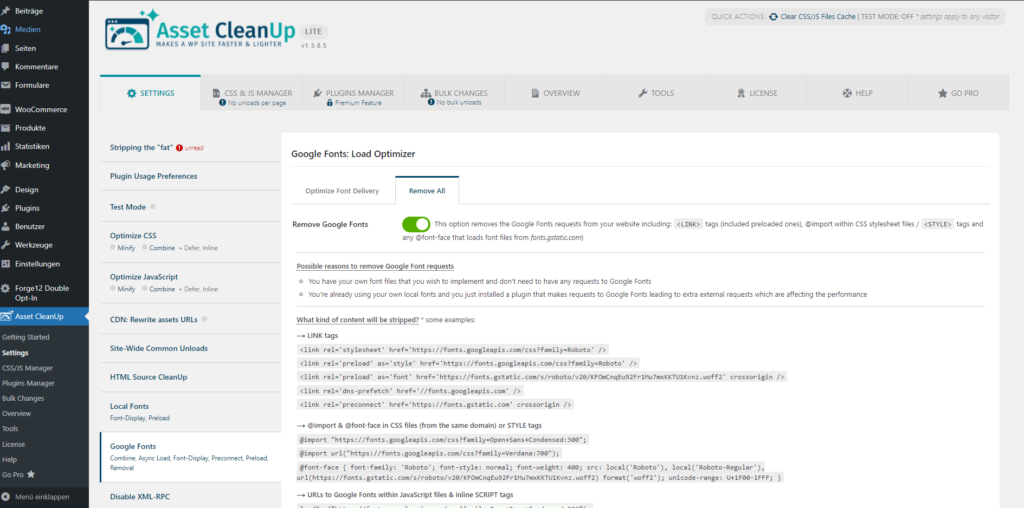
After activation, go to Asset CleanUp > Settings > Google Fonts > Remove All and move the slider to the right. This will search the HTML code for common formats of the Google Fonts link. Hits will be removed automatically.

Then save the settings and clear the cache of your WordPress website (if available).
Summary #
That was it. As you can see, removing Google links is possible in a few steps without any programming knowledge. Nevertheless, you should check your page afterwards for possible occurrences of Google fonts. The WordPress plugin Asset CleanUp finds many of the links, but it can also happen here and there that individual links fall through the grid. Then usually only the individual correction helps.
Feel free to contact us if you need help removing the links. Then we will do it for you at a fixed price. Just arrange a first meeting.
Useful links #
Artikel von:
Marc Wagner
Hi Marc here. I’m the founder of Forge12 Interactive and have been passionate about building websites, online stores, applications and SaaS solutions for businesses for over 20 years. Before founding the company, I already worked in publicly listed companies and acquired all kinds of knowledge. Now I want to pass this knowledge on to my customers.

