7 tips to improve the performance of your WordPress site
Marc Wagner
July 15, 2021
With these 7 tips, you can optimize your website to get better values for the Google Core Web Vitals. The Core Web Vitals were introduced in June 2021 and are now also another ranking factor.
How can I measure the loading times of my WordPress website? #
Good question, there are now many free tools on the Internet for that. Above all, GTMetrix and Google PageSpeed Insights have established themselves.
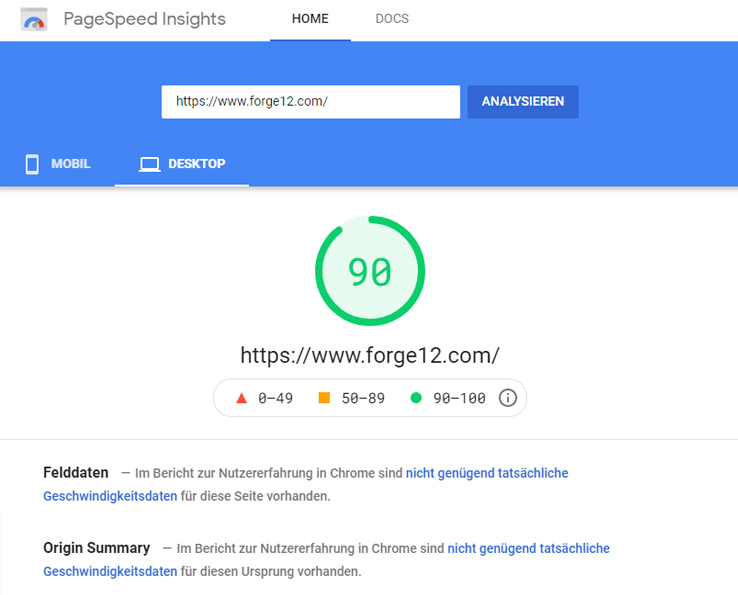
Before you start optimizing your website, you should try one of the tools to get some helpful tips. Here is an example from our site.

You should take the test regularly, ideally whenever you have made major changes.
Step 1: Check server response times #
The first thing you should check is whether your server is even suitable for your website. There are as many hosting providers as there are, a dime a dozen these days. In addition, they all regularly undercut each other in terms of price — which of course also affects performance.
In the case of hosting, the provider makes a server available. But then 10–30 websites are placed on this. This means that these websites then share the available power.
As you can see, only a fraction of all resources are available to you. Now, it is the case that many hosters naturally want to achieve the maximum profit. Therefore, the hardware is of course not the latest and also not the fastest. In addition, the servers have not been optimized for WordPress either.
So what to do ? Which is the right provider now? The best thing to do is to look for a provider who specializes on WordPress. This is where RAIDBOXES come to mind.
Alternatively, Alfahosting and All-Inclusive have also received good reviews.
Step 2: Set up the WordPress Cache System #
If you are not yet using a cache system, you should definitely install one. There are also countless plugins that you can use for this.
We mostly use WP Rocket. This is a premium plugin that offers you many functions to optimize your site.
If you prefer not to spend any money, you can use WP Fastest Cache or W3 Total Cache. Both plugins offer a scaled-down free version.
If you’re wondering what these plugins can do for you, that’s very simple: They optimize your site so that it loads faster.
For example, the plugin can be used to optimize the caching guidelines for your files and images. Files then do not have to be downloaded over and over again, but only when they have changed.
In addition, the common cache plugins offer the option of compressing and combining CSS and JavaScript files (if HTTP/2 is not activated).
Of course, there are many more options — depending on the plugin. But that would go beyond the scope of the article. Therefore, you should take a look at all of them and then look for instructions for the selected plugin.
Step 3: Deactivate unnecessary plugins #
Plugins are one reason why your site loads for a long time and gets bad values on the Core Web Vitals. I know there are many plugins that add beautiful new designs, popups, buttons, etc. to your website, but that usually takes a toll on loading times.
The problem is quite simple, that the CSS and JavaScript files are loaded on all pages. Even if you don’t even use the plugin on the site. Collections of snippets in particular are a huge resource hog.
You should now go through your plugins and divide them into 3 groups.
- Essential plugins that are needed for your website to function.
- Optional plugins that you only use to spruce up your website.
- Backend plugins that are only used for the administration of your website will have no effect in the frontend.
If there are already visitors on your website, you should first consider setting up a staging system. Otherwise it can happen that visitors to your website get error messages and nobody wants that.
As soon as you have completed your division, you should deactivate all plugins that are in group 2.
Then check the loading times of your website again. This is how you can find out which plugins will give you the most performance boost.
For example, we only use a handful of plugins for a WordPress website:
- WP Rocket for the cache
- Borlabs cookie for GDPR
- AIOSEO for SEO
- Redirection for 301/302 Redirects
- WebP Express to provide new image types
- PageBuilder for Content Creation
With this you can already build a great website that looks great and loads quickly.
Step 4: Remove unused CSS and JavaScript #
Now it’s getting a bit technical, but it’s worth it. As already mentioned, plugins load scripts and stylesheets on all pages. Even when you are not actually needed.
Of course, you can determine yourself which files are loaded on which page. For programmers, WordPress offers the option of simply throwing scripts out again before rendering.
function wp_dequeue_my_script() {
     if(is_page(2)){
          // JavaScript
          wp_dequeue_script( 'jquery-ui-core' );
          // Stylesheet
          wp_dequeue_style('style-handle');
     }
}
add_action( 'wp_print_scripts', 'wp_dequeue_my_script', 100 );
You then have to place the code in your functions.php and the ‘jquery-ui-core’ script will be unloaded on the page with ID 2.
This can of course now be repeated for all possible scripts and styles. The whole thing can of course be quite complex, especially if you use many sub-pages.
There are also two plugins for this, the WordPress Asset Manager and Asset CleanUp. Both plugins also offer the free version of removing scripts and stylesheets from pages, contributions or custom post types.
Step 5: Optimize images #
Images play a big role in loading times. It is not uncommon for us to see websites that upload pictures in 4K resolutions and then wonder why the page is slow to load.
Optimize before upload
Before uploading, you should cut your pictures to the correct dimensions with Photoshop, Gimp or another image editing program.
Especially if you use stock photos from Fotolia, Pixabay or Unsplash, you will receive very large files after downloading these images. Therefore, reduce the images to the pixel size you use on your blog or website.
Most image editing programs also offer you to compress your images before saving them. You should set a quality of 60 to 80%. This keeps the image sharp but still becomes a bit smaller. Alternatively, for example, you can use COMPRESS JPEG to compress your image online.
Downsizing when uploading
With WordPress you can use plugins that compress your images when you upload them. To do this, you don’t have to go any further than installing the plugin.
You can use WP Smush.it or Resmush.it, for example. Both plugins are updated regularly and offer you the opportunity to subsequently reduce the size of images that have already been uploaded.
Don’t worry, the quality will be retained.
Step 6: Activate reloading of the images (LazyLoad) #
The reloading of images is also called LazyLoad. Nowadays, you can hardly find a website that does not use the process. Understandable, so the loading time can be reduced considerably, especially for larger pages.
How does the LazyLoad process work?
This is actually quite simple. Basically, images are only loaded when they are in the visible area of your browser (viewport). Images are only loaded when you start scrolling down.
Great idea, right? That’s why you should use this procedure too.
How can I activate LazyLoad?
That depends on the theme or the desired plugins. But you should make sure that you only activate one LazyLoad system. For example, the WordPress theme Avada has an integrated LazyLoad process. But we usually deactivate this and use the WP Rocket function instead, since we always use a caching plugin anyway.
We just noticed that WP Rocket scored better Core Web Vitals than Avada. This is probably also because WP Rocket was specially programmed for it.
If you don’t use WP Rocket or Avada, you can also use Crazy Lazy.
Step 7: Activate HTTP/2 #
HTTP / 2 is the improved version of the HTTP / 1.1 protocol. It is based on the SPDY protocol developed by Google.
With HTTP / 2 it is possible to transmit several elements of a website (images, stylesheets, JavaScript …) via a single connection (multiplex). This was not yet possible with HTTP / 1.1. There, only one element could ever be transmitted over a connection.
The problem was that only between 2 and 13 connections to a server could be opened at the same time (depending on the browser). That is why at that time an attempt was made to automatically group scripts and transfer a huge file instead of many small ones.
Many WordPress caching plugins still offer this. You should deactivate this if your server is already using HTTP / 2.
You can find out whether your website supports HTTP / 2 with Geekflare.
If it is not yet activated, you should inquire with your hosting provider or consider switching to another hoster.
Summary #
I hope our 7 tips to improve the loading times of your WordPress site helped you. Do you have any tips or questions about the loading times of your WordPress site yourself? Then please leave us a comment.
Artikel von:
Marc Wagner
Hi Marc here. I’m the founder of Forge12 Interactive and have been passionate about building websites, online stores, applications and SaaS solutions for businesses for over 20 years. Before founding the company, I already worked in publicly listed companies and acquired all kinds of knowledge. Now I want to pass this knowledge on to my customers.

