This is how you can increase the WordPress memory limit.
Marc Wagner
March 10, 2022
To increase the WordPress memory limit on your website, you just need to modify the wp-config.php configuration file. To do this, add the following line of code:
define('WP_MEMORY_LIMIT', '256M');The 256M then stands for 256 MB. Of course, you can also enter another number, such as 64M, 128M or 512M.
The maximum amount of memory you can set depends on your hosting provider. For a web hosting, the available RAM is usually between 64 and 512 MB. With a vServer, Managed Server or Dedicated Server, the value is typically much higher or can be set individually.
This is how you can increase the memory additionally for the WP Dashboard (backend) on WordPress #
In addition to the default setting, you can also increase the memory only for the admin settings of your WordPress website. For this purpose, there is the following code line, which you store in the wp-config.php:
define('WP_MAX_MEMORY_LIMIT', '256M')Again, you can adjust the memory as you wish, as long as your hoster supports it. The setting only affects the backend of WordPress.
How to find out how much memory is available for your WordPress website #
To find out how much memory you have available, you can either check your hosting contract or view the PHP info file.
To display the PHP info file, create a new PHP file in the root directory of your WordPress installation, e.g. you can name it info.php. In the file, you add the following content:
<?php
phpinfo();
?>
Then save your file and access it from your browser. If you have saved the file in the root directory of your WordPress installation, the URL is: https://[your-domain]/info.php.
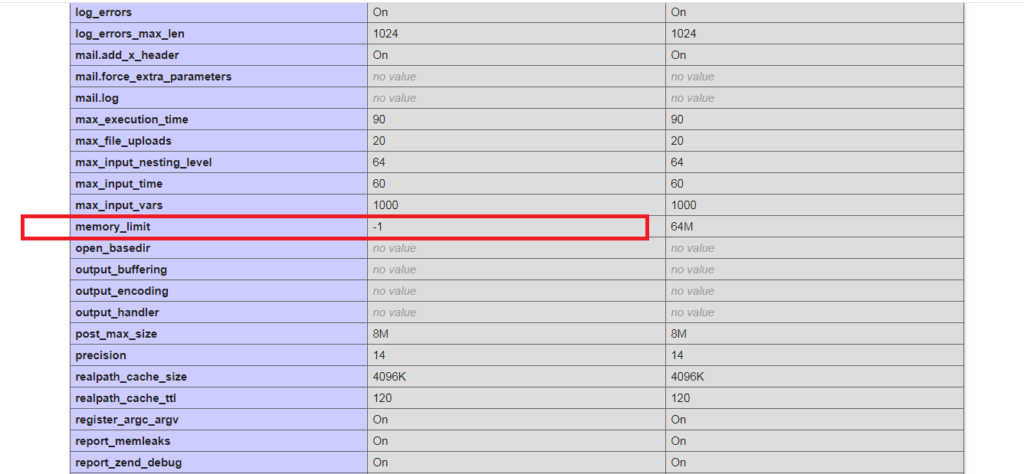
In the browser, you can now see all PHP settings. That means also the “memory_limit”. The best is to use the search CTRL+F to search for the term. You will now see how much memory you have available.

Artikel von:
Marc Wagner
Hi Marc here. I’m the founder of Forge12 Interactive and have been passionate about building websites, online stores, applications and SaaS solutions for businesses for over 20 years. Before founding the company, I already worked in publicly listed companies and acquired all kinds of knowledge. Now I want to pass this knowledge on to my customers.

